Adding a Calendar
When you use Google Calendar and put it on your website, anytime that you update the calendar on Google, the changes will automatically be reflected on your website.
1) The first choice is whether you want to
2) Go to Google Calendars (make sure you are logged into your aaps account)
3) On your left sidebar, see if you have a "Thurston Elementary School" calendar. It would be under "Other Calendars". If you do NOT have it, go to step 4. If you do have it, skip to step 5.
4) Under "Other Calendars" there is a box that says "Add a coworker's calendar". In that box, paste the following:
- Designate a page strictly dedicated to a calendar (example) OR
- Add a calendar to a page you already have (like the homepage) (example)
2) Go to Google Calendars (make sure you are logged into your aaps account)
3) On your left sidebar, see if you have a "Thurston Elementary School" calendar. It would be under "Other Calendars". If you do NOT have it, go to step 4. If you do have it, skip to step 5.
4) Under "Other Calendars" there is a box that says "Add a coworker's calendar". In that box, paste the following:
| aaps.k12.mi.us_7ihcm4dvroa38jj6j2drqlm8ag@group.calendar.google.com |
5) If you don't already have your own classroom calendar, you should create one. Click on the down arrow after "My Calendars" and select "Create new calendar"
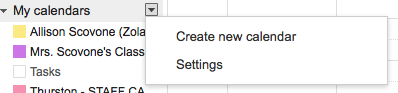
6) Enter a name for your calendar. Like "Mrs. Scovone's Class Calendar"
7) Under "share this calendar with others" Place a check mark under "Share this calendar" AND "Make this calendar public"
7) Under "share this calendar with others" Place a check mark under "Share this calendar" AND "Make this calendar public"

8) Click "Create Calendar" at the bottom
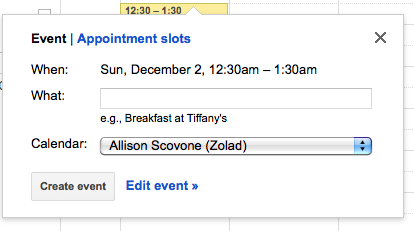
9) Add a couple of events.
9) Add a couple of events.
- Select the date, a pop up will appear
Type in the event (like project due, permission slip due, etc.) Don't worry about school breaks, those will be on the Thurston Calendar. - Make sure the class calendar is selected under "Calendar:"
- To change the time or make it all day, click "Edit Event"
- When you are done, click "save"
- Repeat for each event.
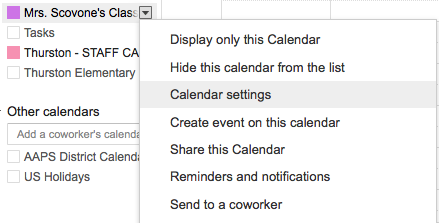
10) Now it's time to put your calendar on your website. Click on the arrow to the right of your calendar name. Select "Calendar Settings"
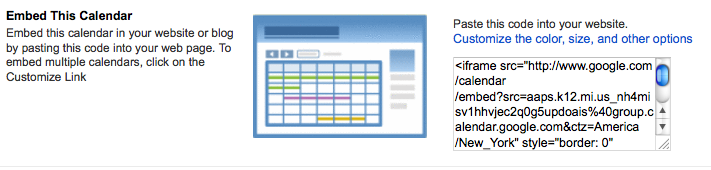
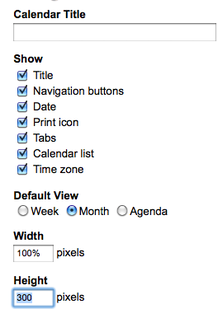
11) Scroll down to "Embed this Calendar." Click "Customize the color, size, and other options"
12) You have two options for how your calendar can appear on your page:
OPTION 1: AGENDA
|
OPTION 2: CALENDAR - by week or month
|
|
Under "default view" choose which view you would like.
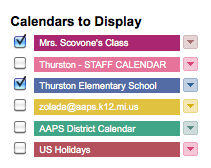
13) Under "width" and "height" play with the numbers to figure out how big you want the calendar. If you type in 100% for width, it will span the entire page. 14) Under "Calendars to Display" make sure your class calendar and the "Thurston Elementary School" Calendar are checked. |
|
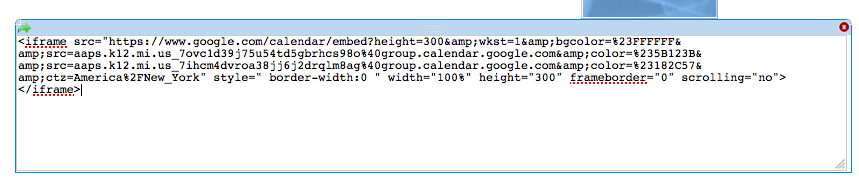
15) Click "Update HTML", then copy the code in the box.

|
16) Go back to Weebly. Drag and drop the "Custom HTML" from the basic toolbar to your page.
If you want to place it adjacent to text or a picture, you will need to use multiple columns first. Go here for information on how to add columns. 
|
17) Click on the the custom HTML that you placed on the page. Paste the code you copied. Click outside of the box and your calendar will appear.
|
18) You're done! Click publish at the top!
